Accessing Your Data: Difference between revisions
No edit summary |
|||
| (3 intermediate revisions by 2 users not shown) | |||
| Line 11: | Line 11: | ||
Finder -> Go -> Utilities -> Terminal | Finder -> Go -> Utilities -> Terminal | ||
gordonps-Computer:~ gordonp$ '''ssh gordp@ | gordonps-Computer:~ gordonp$ '''ssh gordp@teleport.iat.sfu.ca''' | ||
If this is the first time you've connected, you will be greeted with a question about whether you want to continue connecting; answer yes: | If this is the first time you've connected, you will be greeted with a question about whether you want to continue connecting; answer yes: | ||
The authenticity of host ' | The authenticity of host 'teleport.iat.sfu.ca (209.87.56.232)' can't be established. | ||
RSA key fingerprint is | RSA key fingerprint is 6e:60:b0:ce:c2:2a:40:f9:05:de:89:12:41:ad:5e:83. | ||
Are you sure you want to continue connecting (yes/no)? '''yes''' | Are you sure you want to continue connecting (yes/no)? '''yes''' | ||
| Line 30: | Line 30: | ||
===GUI Access=== | ===GUI Access=== | ||
====Windows==== | ====Windows==== | ||
WinSCP, freeNX client | WinSCP, freeNX client. | ||
<br> | |||
===== WinSCP ===== | |||
<br> | |||
WinSCP is an open source free SFTP client and FTP client for Windows. Legacy SCP protocol is also supported. Its main function is safe copying of files between a local and a remote computer. It can be obtained from http://winscp.net/eng/index.php. | |||
<br><br> | |||
After installing WinSCP, double-click on it. You will be presented with the following screen: | |||
<br> | |||
[[Image:scp1.jpg|Opening WinSCP screen]]<br> | |||
Click on '''New'''. | |||
<br> | |||
<br> | |||
Next, type in the following information: | |||
<blockquote> | |||
Host name: '''teleport.iat.sfu.ca'''<br> | |||
Port number: '''22'''<br> | |||
User name: '''your Research account username'''<br> | |||
Password: '''your Research account password'''<br> | |||
File protocol: '''SFTP''' | |||
</blockquote><br> | |||
Then click on '''Login'''.<br> | |||
[[Image:winscp-teleport-02.jpg|Opening WinSCP screen]] | |||
<br><br> | |||
You will then be connected to Teleport, and be presented with the file listing of your user storage directory: | |||
<br> | |||
[[Image:winscp-teleport-03.jpg|Opening WinSCP screen]] | |||
<br> | |||
You can now drag-and-drop files between your local machine's directories and your user storage directory in the Research network. | |||
====Mac OS-X==== | ====Mac OS-X==== | ||
=====Fugu===== | =====Fugu===== | ||
Latest revision as of 20:59, 15 June 2011
There are a number of different ways to access your data, and move bits around. In general, we encourage the use of encryption and secure connections. The methods and tools below will provide access to your home-directory data (stored on our central file-servers).
Quite simply, you can use ssh or ftp to access your data with your research account by connecting to teleport.iat.sfu.ca.
Command Line Access
Windows
PuTTy
Mac OS-X
Built-in: use Terminal, and issue 'ssh <user>@<target_machine>'
Finder -> Go -> Utilities -> Terminal
gordonps-Computer:~ gordonp$ ssh gordp@teleport.iat.sfu.ca
If this is the first time you've connected, you will be greeted with a question about whether you want to continue connecting; answer yes:
The authenticity of host 'teleport.iat.sfu.ca (209.87.56.232)' can't be established.
RSA key fingerprint is 6e:60:b0:ce:c2:2a:40:f9:05:de:89:12:41:ad:5e:83.
Are you sure you want to continue connecting (yes/no)? yes
If you have connected previously, and the key has changed (for a variety of reasons) you might have to briefly edit your .ssh/known_hosts file to remove the conflicting key. A simpler alternative is to remove your .ssh/known_hosts file altogether, and begin collecting keys anew.
Linux/IRIX
same as Mac OS-X
ToDo
- HowTo
- target machines/IP-addresses
- screenshots
GUI Access
Windows
WinSCP, freeNX client.
WinSCP
WinSCP is an open source free SFTP client and FTP client for Windows. Legacy SCP protocol is also supported. Its main function is safe copying of files between a local and a remote computer. It can be obtained from http://winscp.net/eng/index.php.
After installing WinSCP, double-click on it. You will be presented with the following screen:
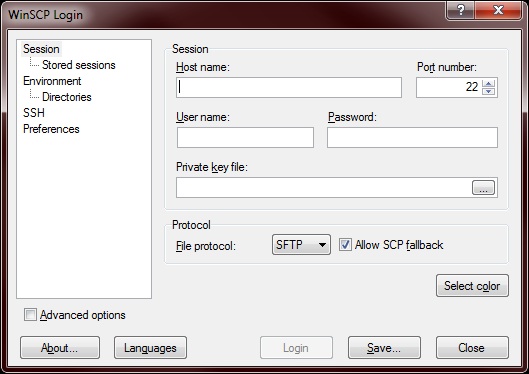
Click on New.
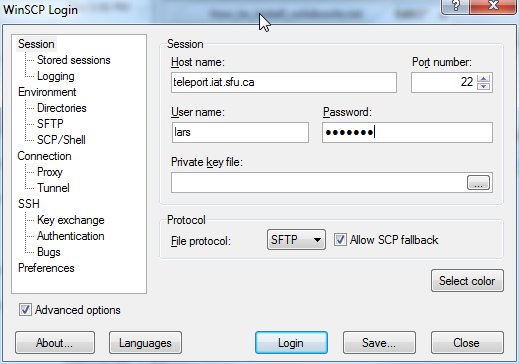
Next, type in the following information:
Host name: teleport.iat.sfu.ca
Port number: 22
User name: your Research account username
Password: your Research account password
File protocol: SFTP
Then click on Login.
You will then be connected to Teleport, and be presented with the file listing of your user storage directory:
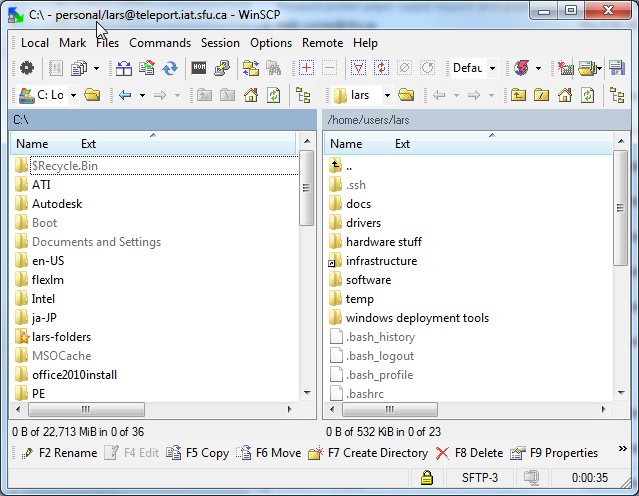
You can now drag-and-drop files between your local machine's directories and your user storage directory in the Research network.
Mac OS-X
Fugu
You can obtain Fugu from http://rsug.itd.umich.edu/software/fugu/ (or, if this link is broken, try this File:Fugu-1.2.0-English.dmg).
Once installed, you can drag-and-drop files between your local machine, and your centralized Research home directory (or any other machine supporting SSH / SFTP). For all intents and purposes, the behaviour is like traditional FTP, except that all data (including your password!) is encrypted.
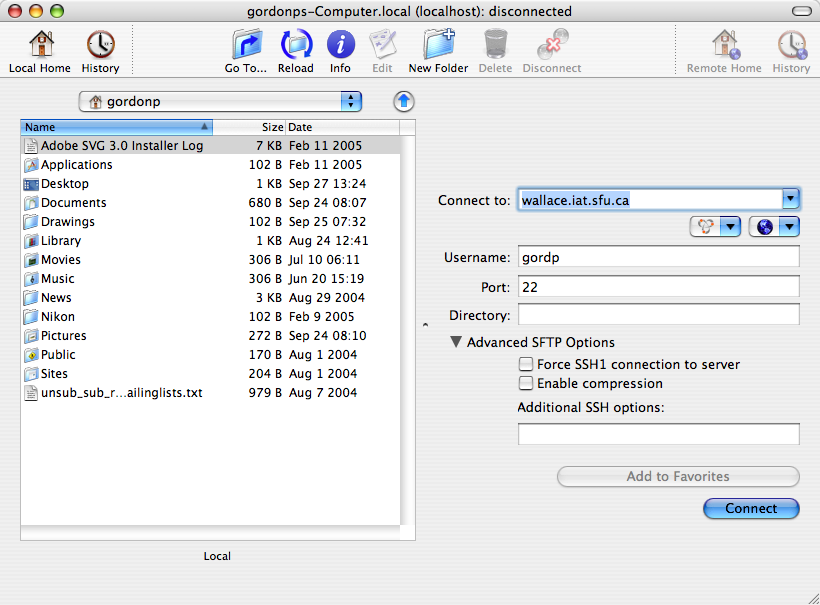
When you start Fugu, here are some typical settings you must supply in order to connect:
If this is your first time connecting to a server, then you will be prompted to accept the RSA key (which you must do):
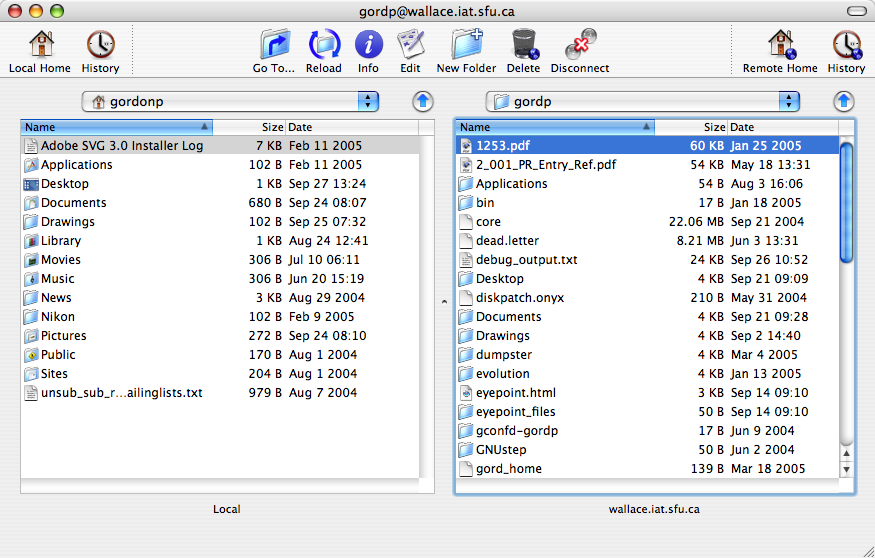
Once you successfully connect, this is what a typical session will look like; you can drag-and-drop files in either direction:
FreeNX Client
This requires X-windows be installed on your Mac. See an Administrator to have XCode tools installed (or prepare by doing this yourself). The X-window session is run "rooted" (that is, it takes over your entire screen); to switch back to OS-X, you press Apple-Option-A.
The FreeNX client goes far beyond simply transferring files - rather, it is a complete "remote desktop". Generally, host-machines are not (yet) configured to provide this service, but if needed will will do so (in preference to Apple Remote Desktop, VNC, or other technologies).
You can download the FreeNX client for Mac from http://www.nomachine.com/ or, use this [[Image:|local copy]]
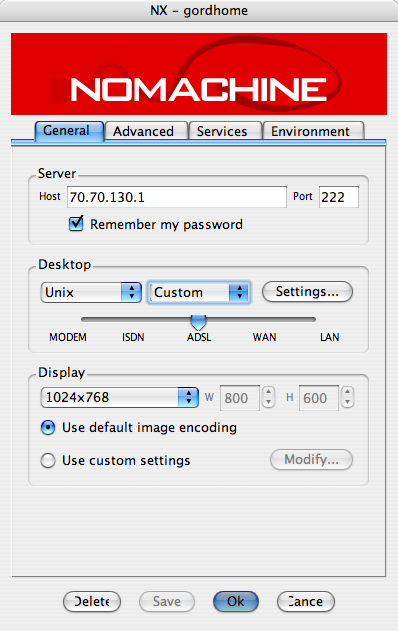
After running the Wizard (and for subsequent sessions) you should see a screen something like this (please not that my use of Port 222 is non-standard; Port 22 should normally be used):
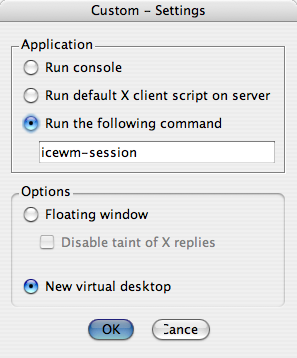
Here is an example of a Custom connection command (which you don't require if you're using Gnome or KDE; choose those window-managers rather than Custom). In this case, I am invoking a light-weight window-manager:
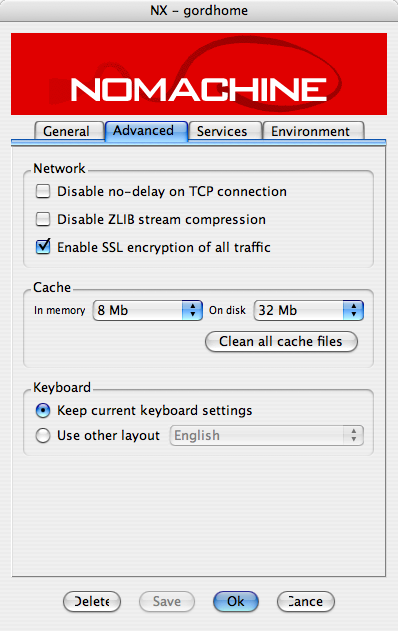
In all circumstances, whether you run a "stock" Gnome/KDE session, or a Custom one, you MUST enable SSL!!! This is what "tunnels" your X-window session over SSH:
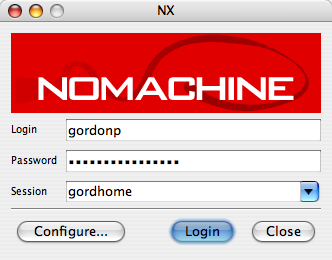
After everything is configured, and for every subsequent connect, once you launch NXClient, you should be greeted with this screen:
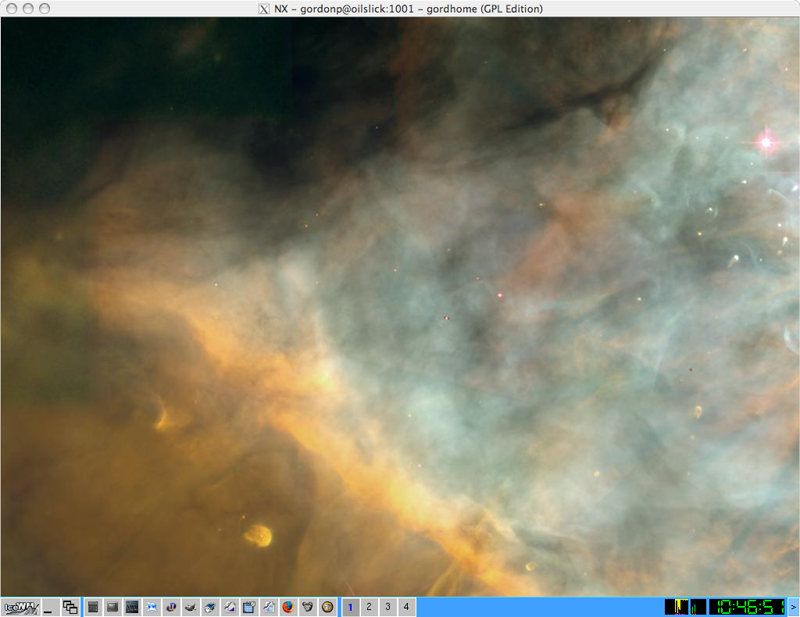
An established connection, showing the remote window-manager and desktop:
Linux
Konqueror
Typical Konqueror address-bar syntax (where the fish:// protocol means "over SSH"). Replace gordp with your Research username:
fish://gordp@teleport.iat.sfu.ca/
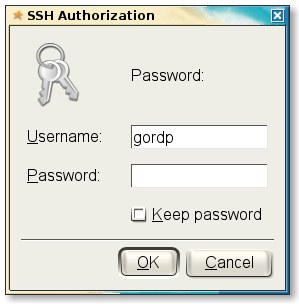
You are prompted for your Research password:
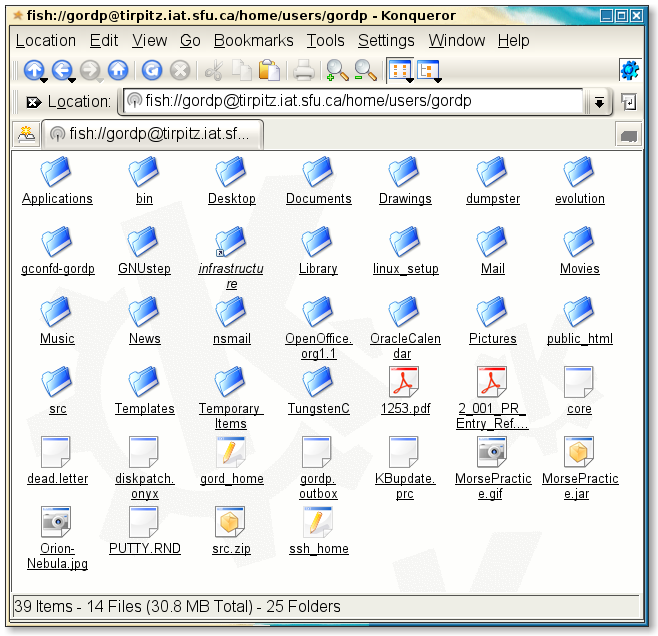
Resulting connection:
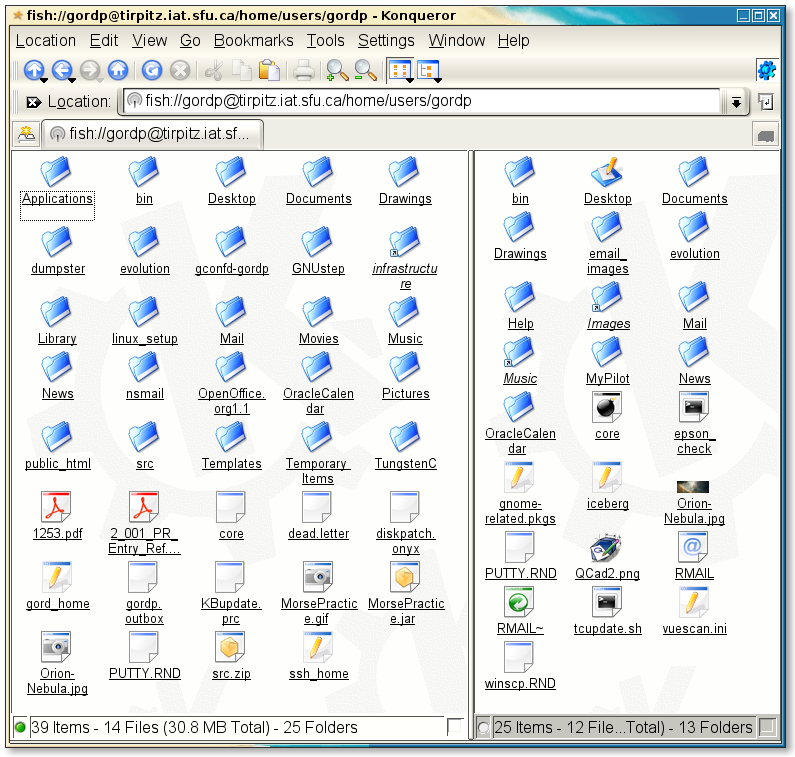
In Konqueror, if you split the window and show both a local directory and the remote one, you can easily drag-and-drop files from one to the other (from the Konqueror menu-bar: Window -> Split View Left/Right):
FreeNX Client
IRIX
not known
ToDo
- FreeNX to become our preferred GUI
- client availability t.b.d. We should have direct links for local-downloads, to help users
- screenshots
NFS/SMB Mounting
NFS mounting is not available off-campus.
SMB mounting is not available off-campus.
Windows
SMB mount - automatic upon successful login
Mac OS-X
NFS mount - automatic upon successful login
Linux
NFS mount - automatic upon successful login
IRIX
NFS mount - automatic upon successful login
ToDo
- HowTo
- typical /etc/fstab entries for the Linux DIY'er
- target machines/IP-addresses
