HOWTO Install Printers Under Linux: Difference between revisions
No edit summary |
|||
| Line 1: | Line 1: | ||
== Linux (and Unix) Printer Installation (using CUPS) == | == Linux (and Unix) Printer Installation (using CUPS) == | ||
On any system running CUPS (Common Unix Printing System - all modern Unices), you can point a browser at port 631 on the local machine, and click on the " | On any system running CUPS (Common Unix Printing System - all modern Unices), you can point a browser at port 631 on the local machine (http://localhost:631), and click on the "Administration" menu item. | ||
<br> | <br> | ||
[[Image: | [[Image:Linux-printer-setup-2012-01.jpg]] | ||
<br> | <br> | ||
<br> | <br> | ||
<br> | <br> | ||
Click on "Add Printer". | |||
<br> | <br> | ||
[[Image:Linux-printer-setup-2012-02.jpg]] | |||
<br> | <br> | ||
<br> | <br> | ||
<br> | <br> | ||
All our Research printers are PostScript-capable, and are network-enabled. With that in mind, choose AppSocket/HP JetDirect, and click "Continue". | |||
<br> | <br> | ||
[[Image:Linux-printer-setup-2012-03.jpg]] | |||
<br> | <br> | ||
<br> | <br> | ||
<br> | <br> | ||
Now type in the network name of the printer you want to connect to, using the following format and socket. All research lab printers are labelled with their names. When you're done, click on "Continue".<br> | |||
''The final ":9100" means Port 9100, which is the standard JetDirect port to use. If you are adding a Windows XP shared printer, the syntax to use is trickier: smb://''valid_username_on_XP_machine:valid_local_password:''142.58.183.xxx/''winxp_sharename''.'' | |||
<br> | <br> | ||
[[Image: | [[Image:Linux-printer-setup-2012-04.jpg]] | ||
<br> | <br> | ||
<br> | <br> | ||
<br> | <br> | ||
Give the printer a name and descriptive information. You don't need to enable sharing. Click on "Continue" when you're done. | |||
<br> | <br> | ||
[[Image:Linux-printer-setup-2012-05.jpg]] | |||
<br> | <br> | ||
<br> | <br> | ||
<br> | <br> | ||
Choose the manufacturer name. Click "Continue" when done. | |||
<br> | |||
[[Image:Linux-printer-setup-2012-06.jpg]] | |||
<br> | |||
<br> | |||
<br> | |||
Choose the printer model that most closely matches the printer you want to add. Click "Add Printer" when done. | |||
<br> | |||
[[Image:Linux-printer-setup-2012-07.jpg]] | |||
<br> | |||
<br> | |||
<br> | |||
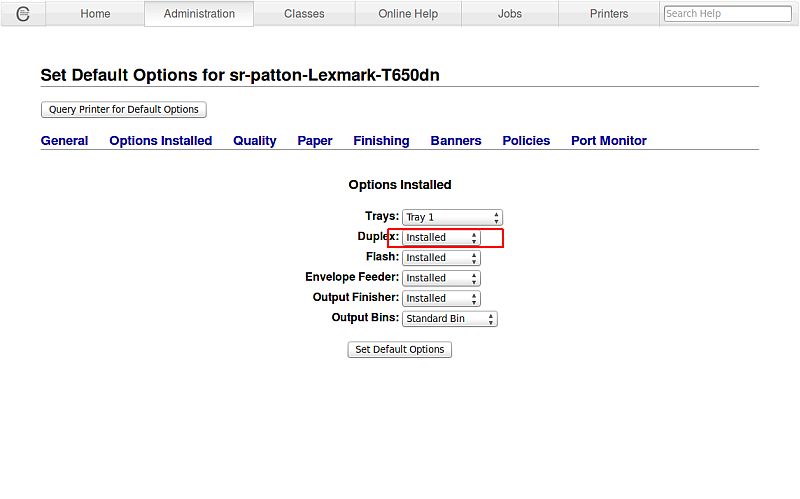
Now that the printer has been added, click on the "Options Installed" menu item, and ensure that Duplex is marked as "Installed". Note: this step only applies to printers that actually have a duplexer unit attached or built-in to them. As of June 2012, only our Lexmark monochrome laser printers support duplex printing. Click "Set Default Options" when done. | |||
<br> | |||
[[Image:Linux-printer-setup-2012-08.jpg]] | |||
<br> | |||
<br> | |||
<br> | |||
Now that we're finished installing the printer, click on "Printers" in the main header menu, and confirm that you see your newly-added printer in the list of available printers. Print a test-page if you wish to verify correct connection to your new printer. Lastly, please use a monochrome laser printer as your default printer. PLEASE DON'T set a colour-laser for default printing because it costs us a LOT more money in supplies and equipment wear and tear. | |||
<br> | |||
[[Image:Linux-printer-setup-2012-09.jpg]] | |||
<br> | |||
<br> | <br> | ||
<br> | <br> | ||
Latest revision as of 20:31, 15 June 2012
Linux (and Unix) Printer Installation (using CUPS)
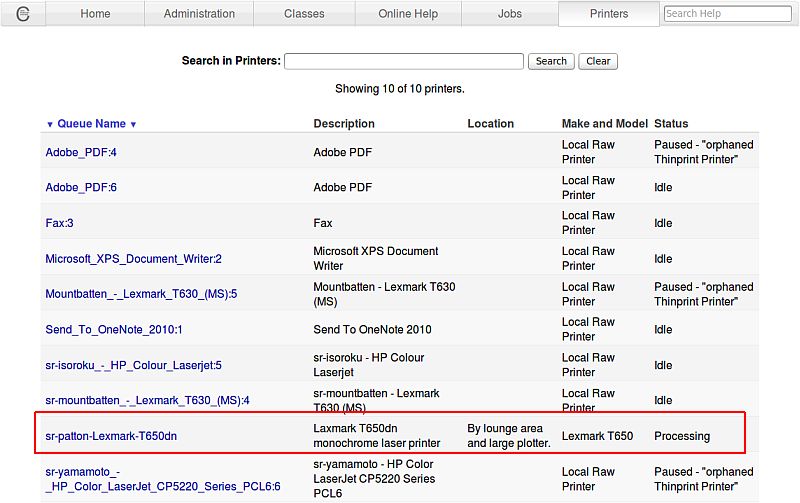
On any system running CUPS (Common Unix Printing System - all modern Unices), you can point a browser at port 631 on the local machine (http://localhost:631), and click on the "Administration" menu item.
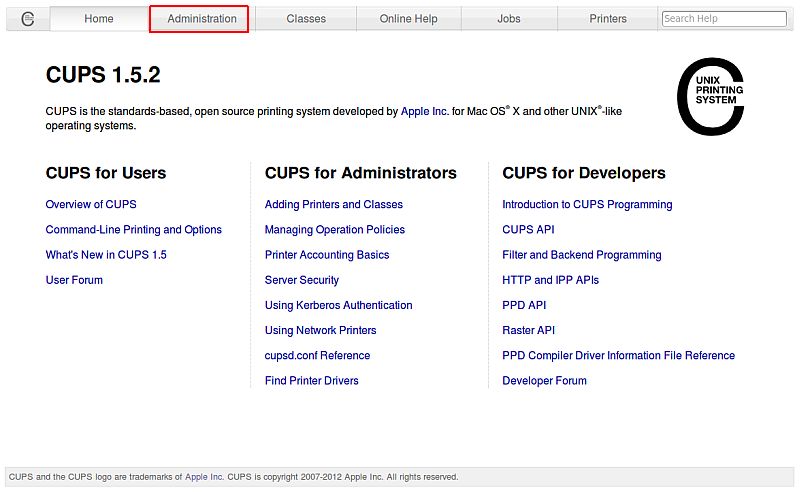
Click on "Add Printer".
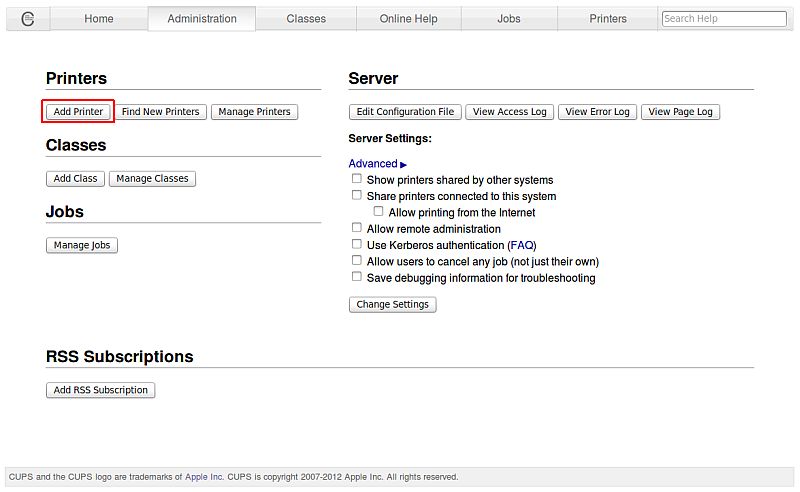
All our Research printers are PostScript-capable, and are network-enabled. With that in mind, choose AppSocket/HP JetDirect, and click "Continue".
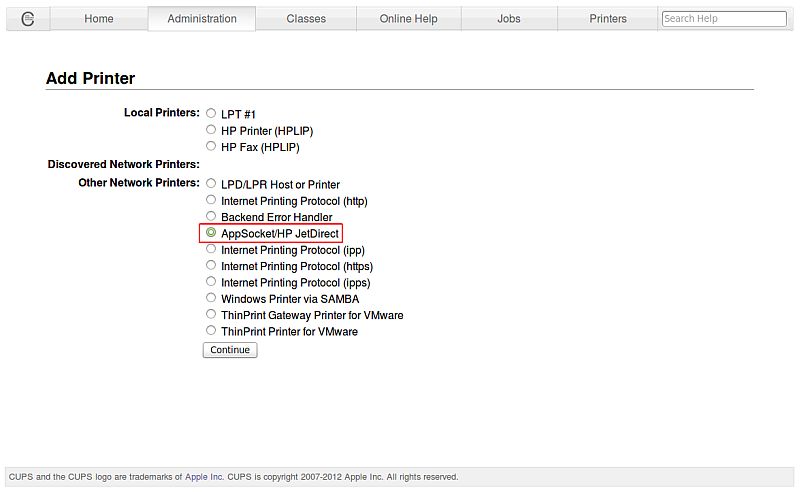
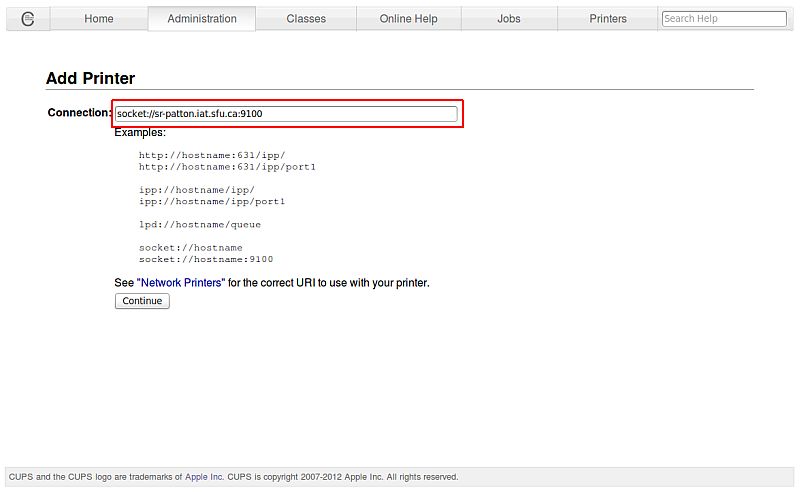
Now type in the network name of the printer you want to connect to, using the following format and socket. All research lab printers are labelled with their names. When you're done, click on "Continue".
The final ":9100" means Port 9100, which is the standard JetDirect port to use. If you are adding a Windows XP shared printer, the syntax to use is trickier: smb://valid_username_on_XP_machine:valid_local_password:142.58.183.xxx/winxp_sharename.
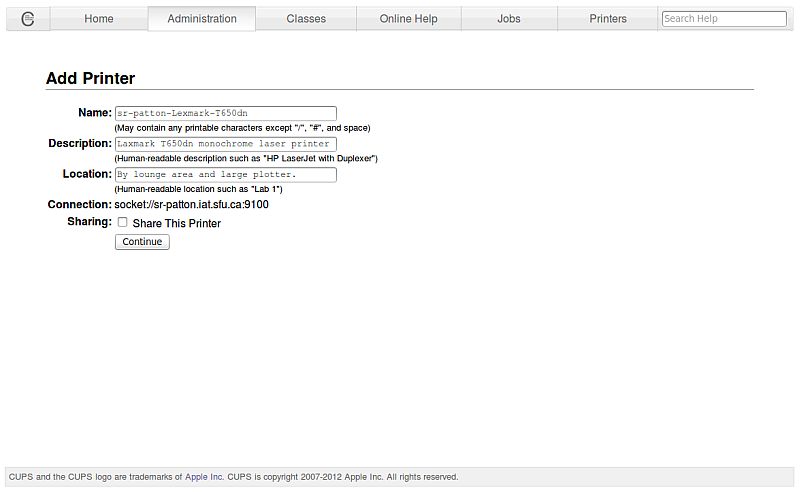
Give the printer a name and descriptive information. You don't need to enable sharing. Click on "Continue" when you're done.
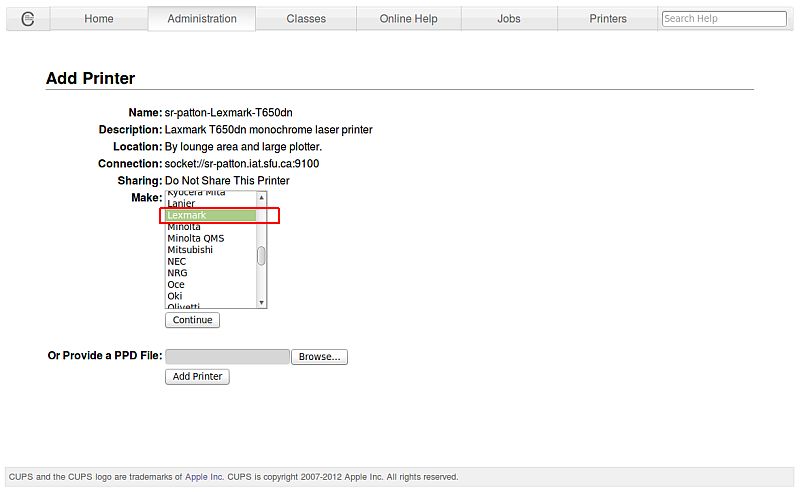
Choose the manufacturer name. Click "Continue" when done.
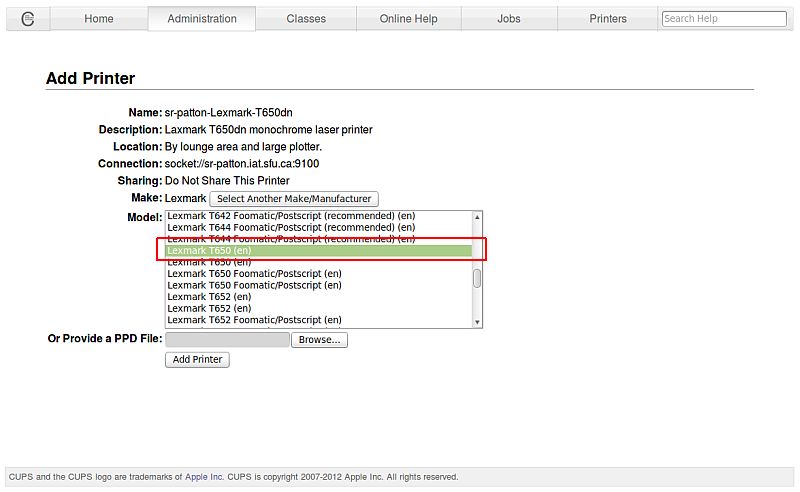
Choose the printer model that most closely matches the printer you want to add. Click "Add Printer" when done.
Now that the printer has been added, click on the "Options Installed" menu item, and ensure that Duplex is marked as "Installed". Note: this step only applies to printers that actually have a duplexer unit attached or built-in to them. As of June 2012, only our Lexmark monochrome laser printers support duplex printing. Click "Set Default Options" when done.
Now that we're finished installing the printer, click on "Printers" in the main header menu, and confirm that you see your newly-added printer in the list of available printers. Print a test-page if you wish to verify correct connection to your new printer. Lastly, please use a monochrome laser printer as your default printer. PLEASE DON'T set a colour-laser for default printing because it costs us a LOT more money in supplies and equipment wear and tear.
