HOWTO Install Printers Under Windows
Windows XP Printer Installation
The following screenshots will guide you through a typical Lexmark T630 installation on a Windows XP workstation.
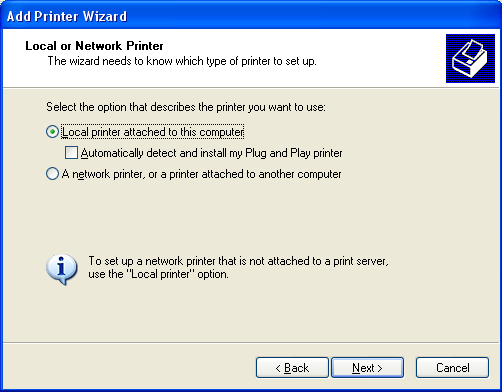
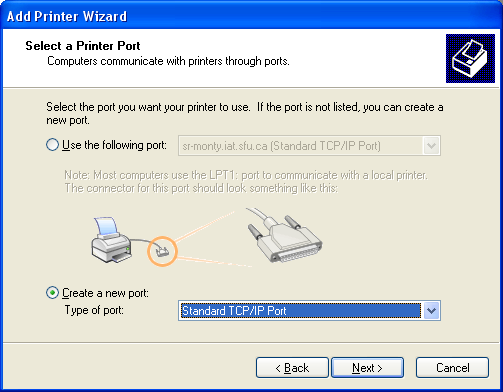
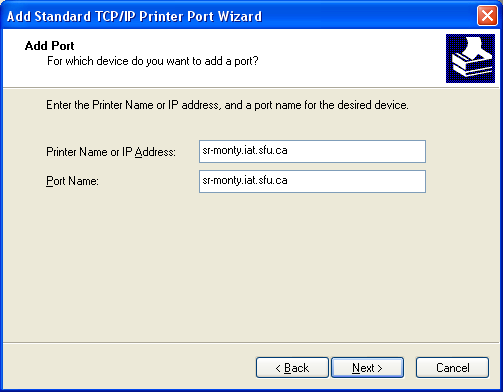
First, invoke the Add Printer Wizard. You do this by clicking Start > Printers and Faxes > Add printer (on the left). When the wizard pops up, an information screen should come up. Hit Next. The screenshots below should help you the rest of the way, but make sure you know the name of your desired printer before you go on.
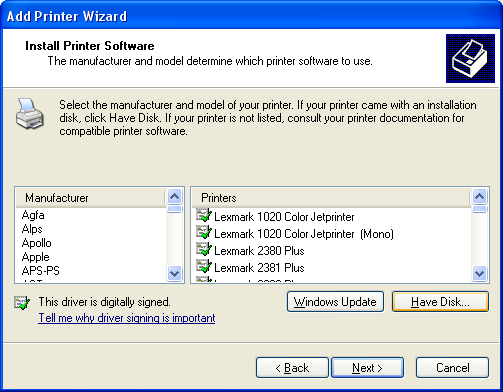
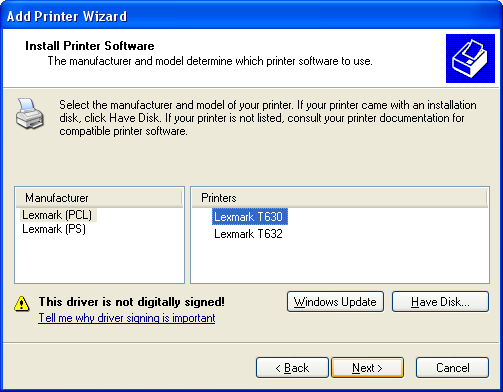
You should now be taken to the following screen, where you need to find the driver for your printer. Click on Have Disk. Also, make sure you've downloaded the drivers. You can find them here:
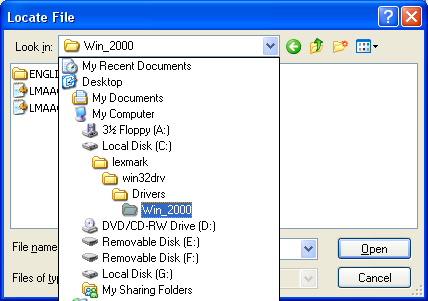
Use the following two screenshots to guide you, note that you may have saved the driver in a different location on your hard drive, in which case you need to point to the right directory.
You don't need to worry about the driver not being digitally signed, just hit next.
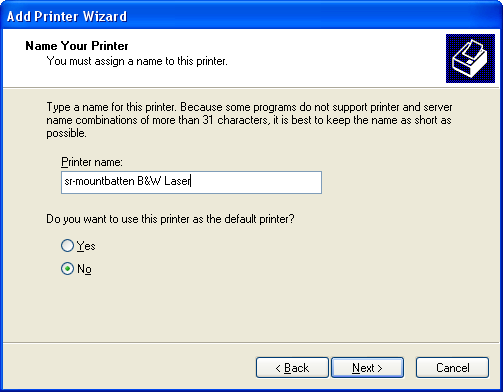
You may be asked if you would like to keep the existing driver or use the new one. Leave "Keep existing" checked. For the following screen, you will need to name the printer you have just added. Please use the following format to make it easier for anyone (including yourself) who will try to print from the workstation.
Click next for the next screen, and to save some trees, choose not to print a test page. If it's not working, ask an administrator instead! Your black and white Lexmark printer should now be set up.
The HP4600 Colour Laserjets are very similar to the Lexmark T630 when installing, except after clicking on Have Disk, point to the directory where you saved the HP drivers, and do the same as you would when installing a Lexmark.
Make sure your Lexmark B&W Laser is set as your default printer, and not your HP Colour LaserJet.
You are now done installing your printers!
Windows 7 Printer Installation
These screenshots will guide you through an installation of an HP Color Laserjet 4600 on a Windows 7 workstation. To begin, click on Start > Devices and Printers.
Click on Add a Printer.
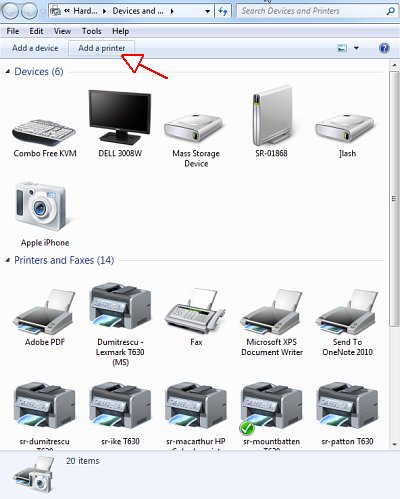
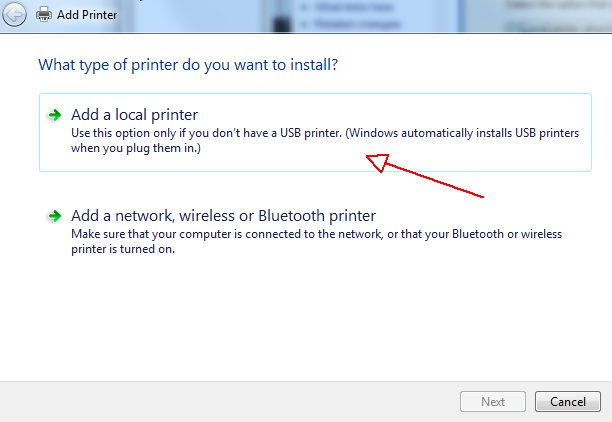
In the next dialog box, click on Add a local printer.
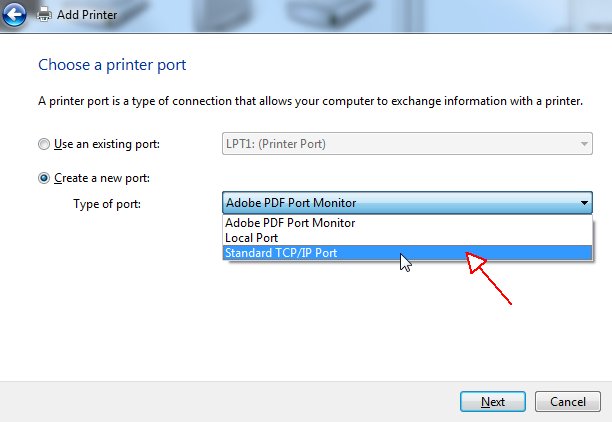
When prompted for the printer port, choose to create a new Standard TCP/IP Port.
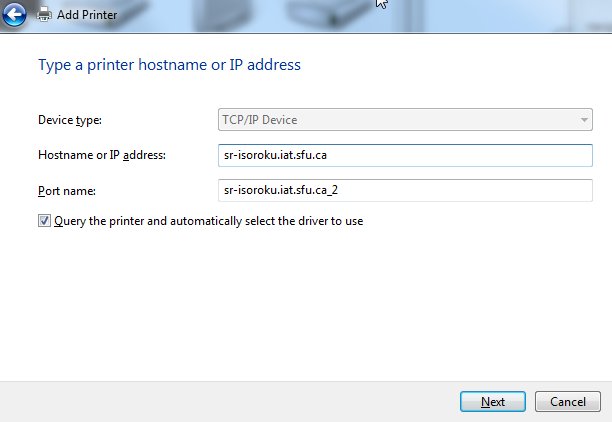
Specify the printer you want to add. In this case, it is sr-isoroku, and its full address is sr-isoroku.iat.sfu.ca. (All Research printers will have their network name listed on the front.) You can use the default Port Name or create your own. Let the system query the printer and automatically choose the printer driver to use. Note: Your Windows 7 installation should already contain the drivers needed for the lab's printers. If not, please contact the Research IT support group.
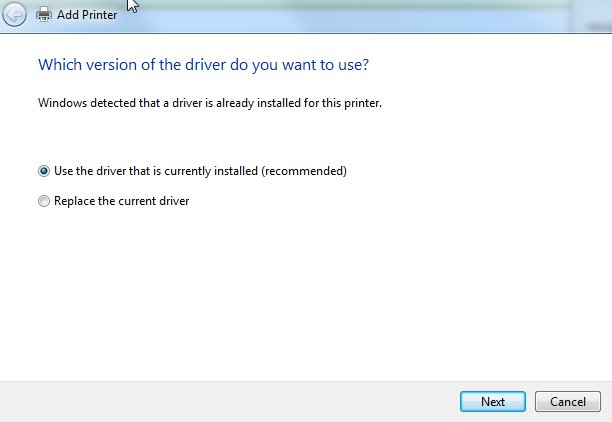
Use the driver that is currently installed.
Enter a name for the printer. We suggest using the name of the printer, along with a description of the printer type (ie: b/w laser or colour laser).
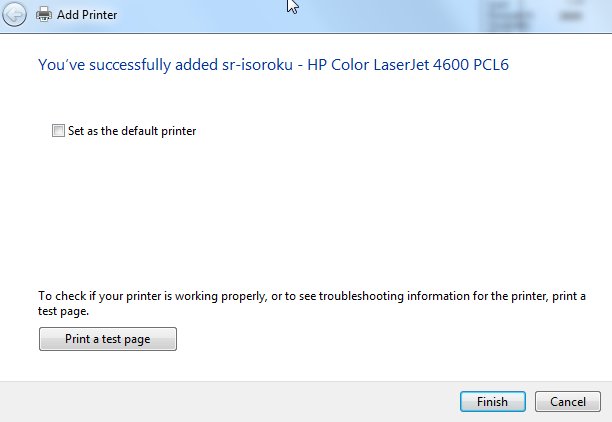
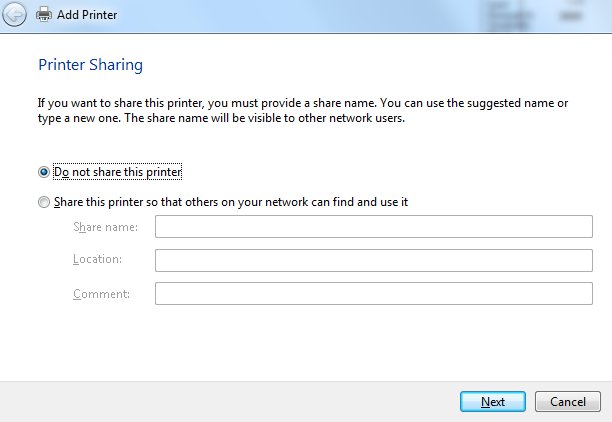
Generally speaking, there's no need to share the printer.
On the last step, you can choose to set the printer as your default printer. To keep toner costs down, we strongly recommend that you do not use colour printers as your default printer. In the interest of saving paper, there's no need to print a test page.
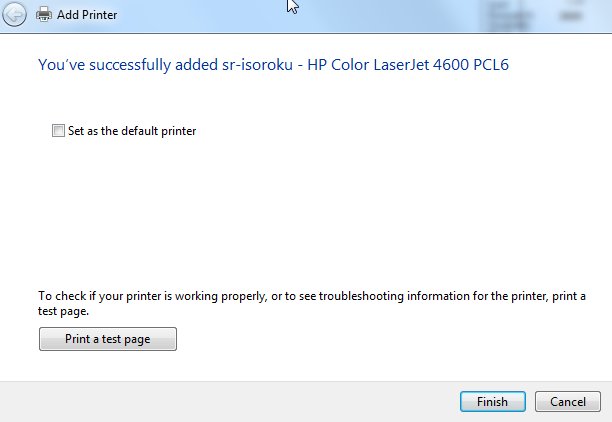
Your printer installation is now complete.
