Konica Minolta Printer Driver - How to Install

From Research
Revision as of 18:52, 5 February 2018 by Lars (talk | contribs) (→‎Mac OS X)
Jump to navigation Jump to search

Obtaining the Printer Driver

Download the printer driver for your OS and printer. You can find the drivers here: Drivers


Before You Begin

You will require an account tracking code and the IP address of the printer you want to install. IP addresses for the Konica Minolta printers can be found here.

Installing the Printer Driver

Windows 7

Unzip the printer driver file, go into the resulting Driver folder and run Setup64.exe.
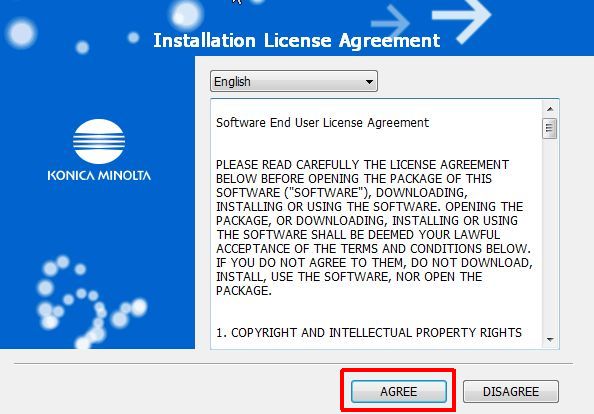
Click on AGREE.
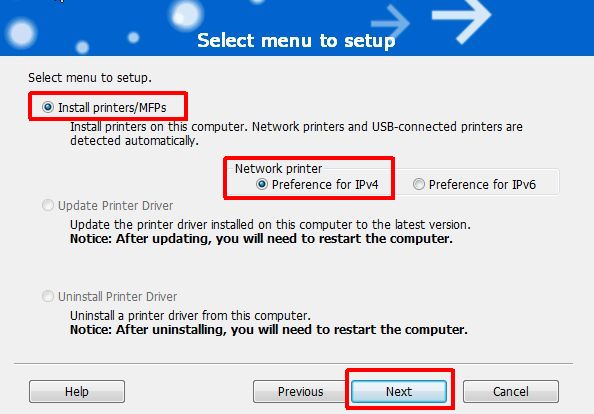
Select Install printers/MFPs and Preference for IPv4, then click on Next.
When this dialog appears, you will probably have to wait for a while for it to search for available printers.
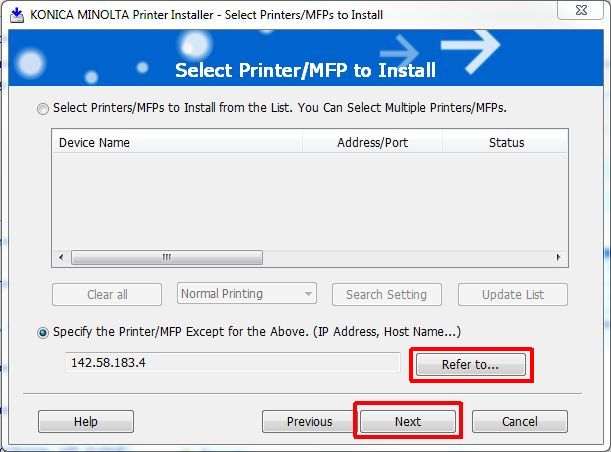
Once it has returned control to you, select Specify the Printer/MFP...(IP Adress, Host Name..., then click on Refer to... It will take you to the Manual Selection dialog.
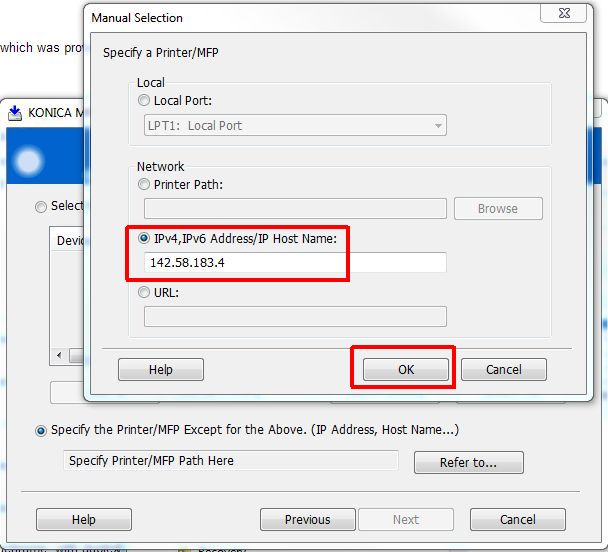
Type in the IP address of the printer you want to use. Once you've typed in the IP, click on OK.
When you're back at the Select Printer/MFP to Install dialog, click on Next.
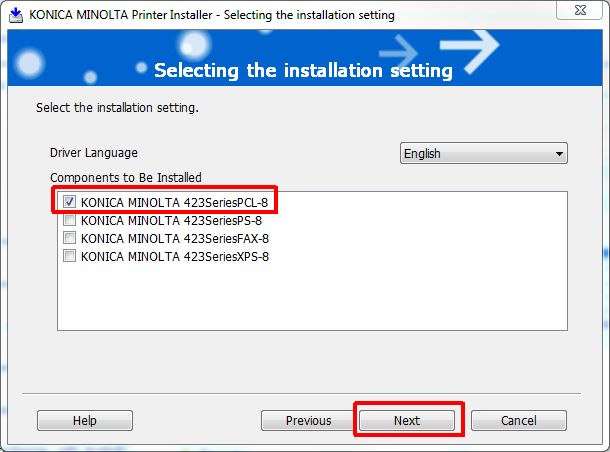
Select the PCL driver, then click on Next.
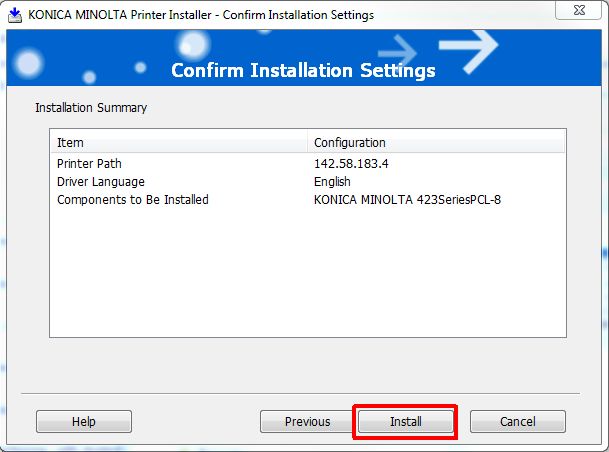
Click on Install.
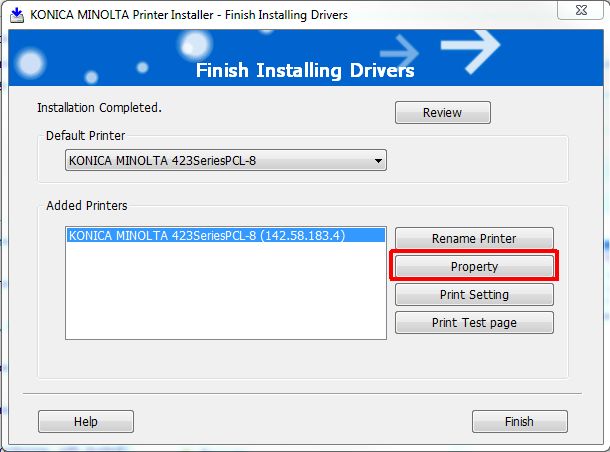
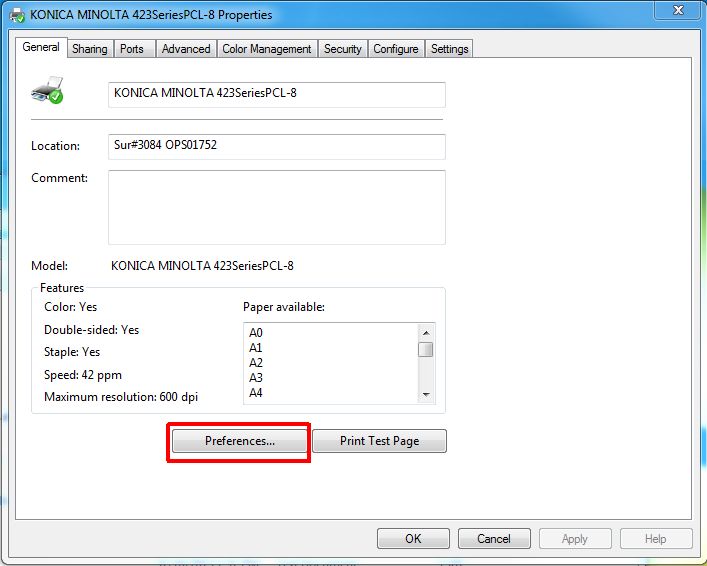
When the installation has completed, click on the Property button.
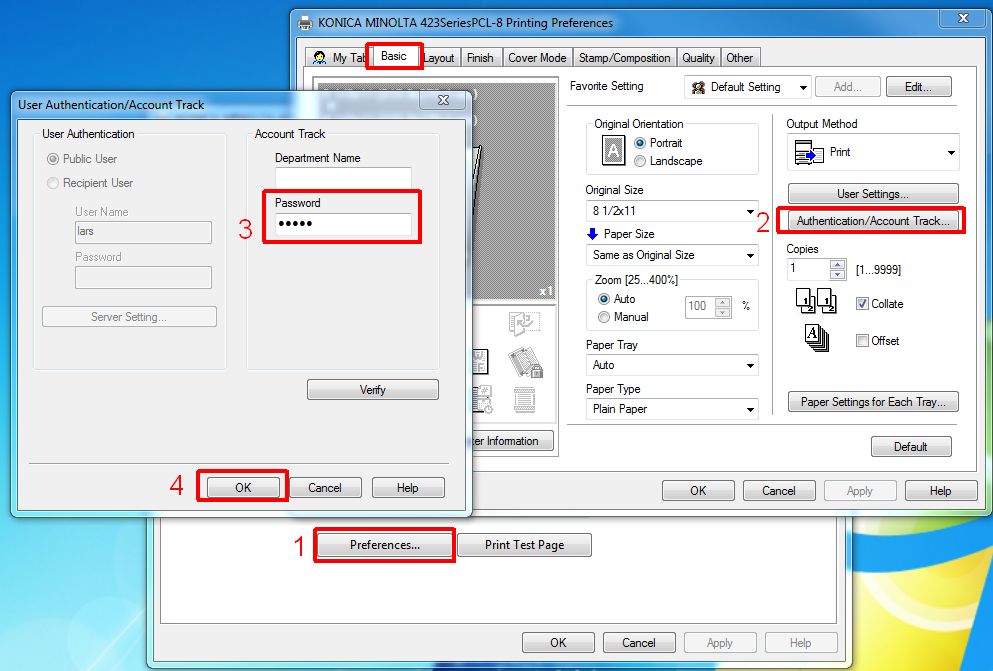
Click on Preferences....
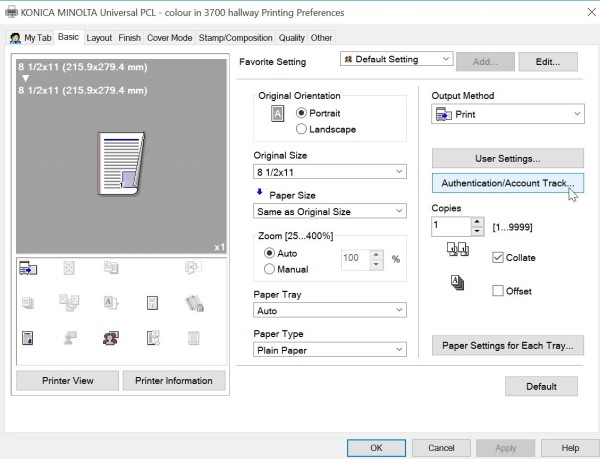
On the Printing Preferences dialog, click on the Basic tab, then click on Authentication/Account Track....
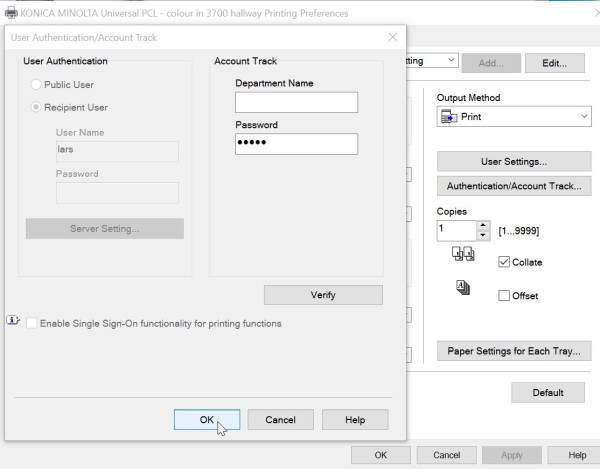
On the User Authentication/Account Track dialog, enter your account tracking code in the Password field, then click on OK.
Click OK on the subsequent dialogs, and Finish on the last dialog.


You have now succesfully installed the printer driver.

IF THE ACCOUNT TRACK FIELDS ARE GREYED OUT, PLEASE TRY THIS: Accounting Tracking Greyed Out?

Windows 10

Unzip the printer driver file and remember the location where you extracted the contents.
You can obtain drivers here: Drivers
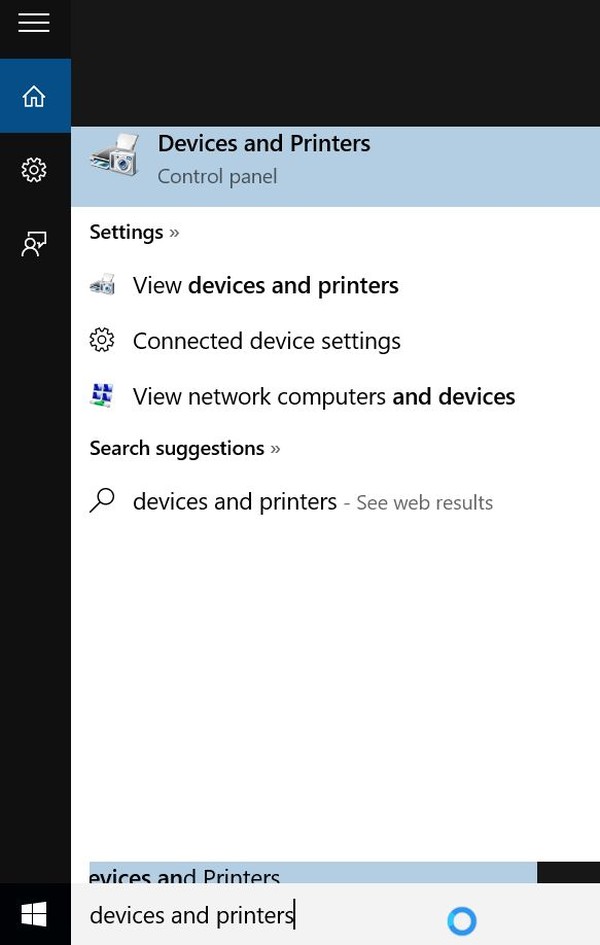
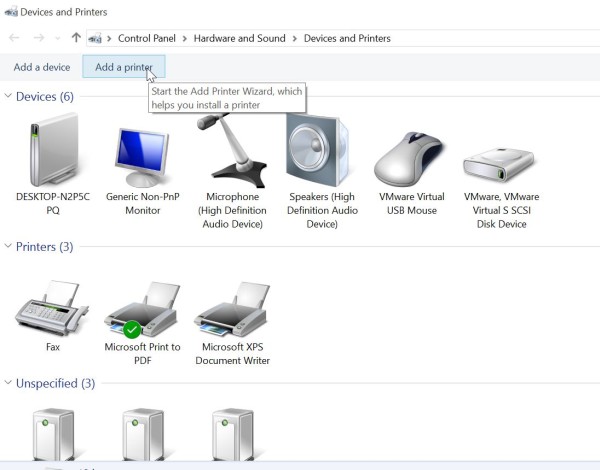
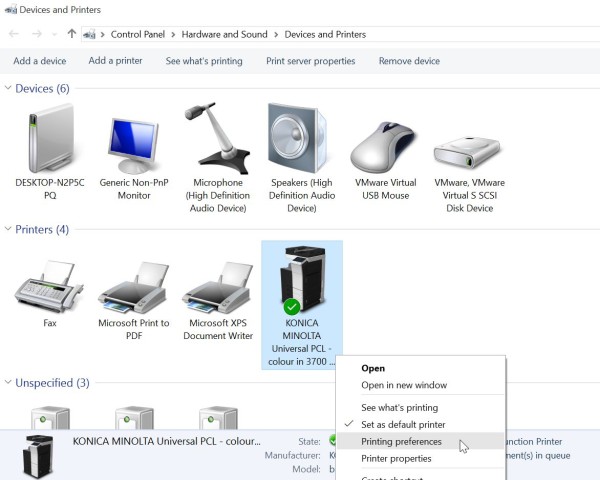
In the Windows 10 search box, search for "devices and printers" and then double-click on Devices and Printers.
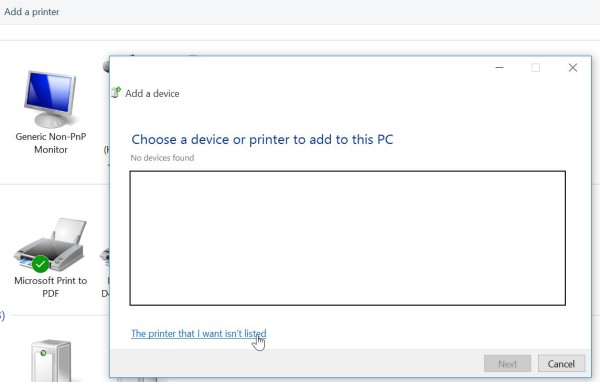
Double-click on Add a printer.
In the Add a device dialog box, click on The printer that I want isn't listed.
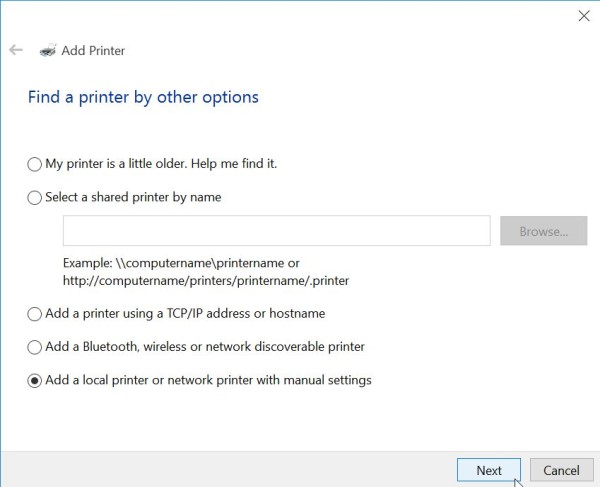
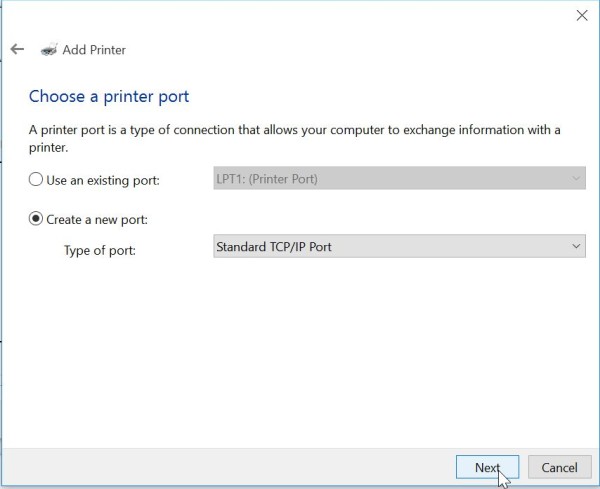
Add a "local printer".
Create a new TCP/IP port.
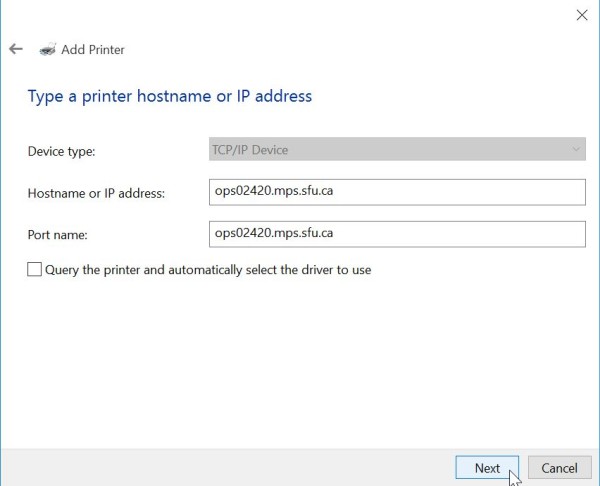
Enter the host name or IP address of the printer
DO NOT let the program automatically select the driver to use.
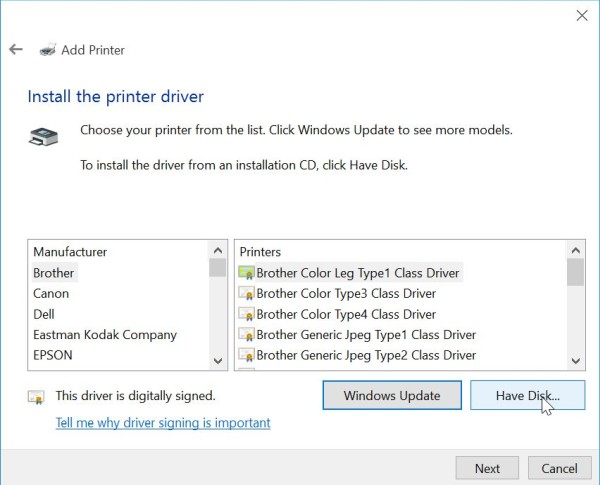
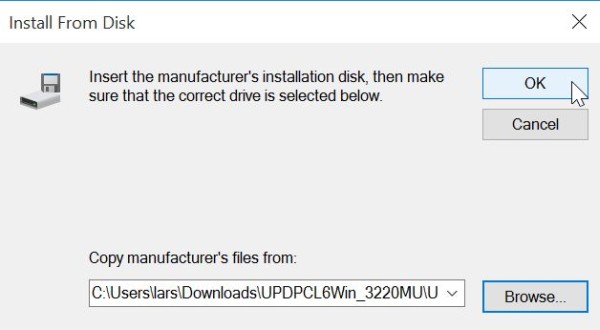
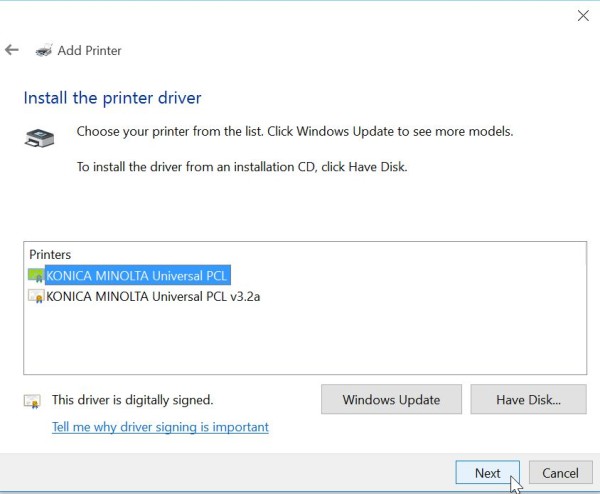
Rather than selecting from a pre-installed printer driver, point to the drivers you installed earlier by clicking on Have Disk....
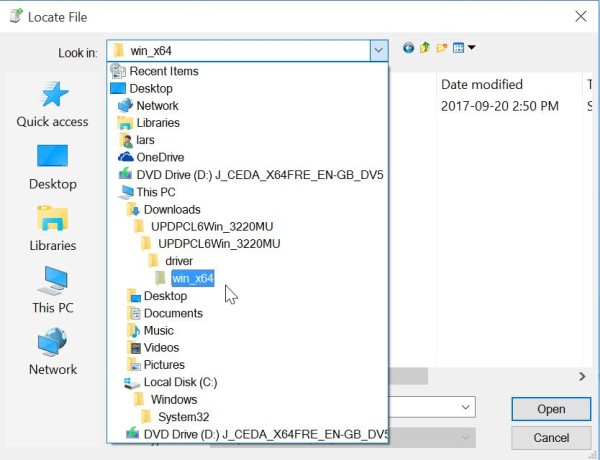
Navigate to the folder where you previously unzipped the printer drivers.
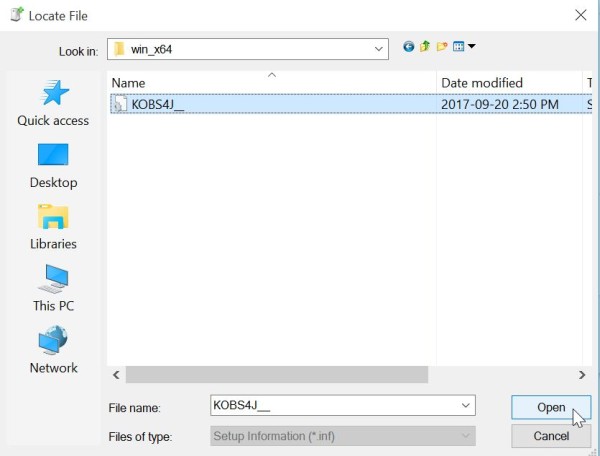
If you drill down to the x64 driver folder, the dialog will find a suitable file.
Click on OK to begin the installation.
Choose the driver type.
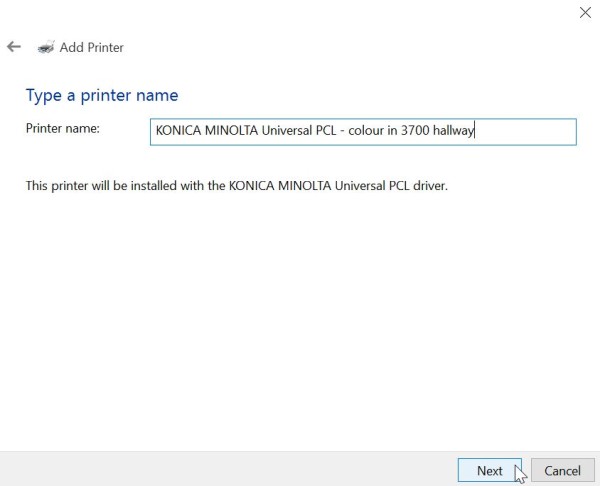
Give the printer a name (you can change or amend the default name).
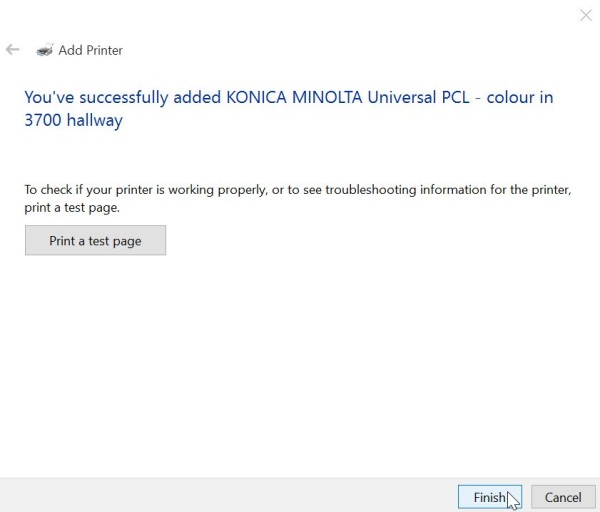
Click on Finish. The next step is to configure your printer.
Right-click on the printer you just installed, and then click on Printing preferences.
Go to the Basic tab and click on Authentication/Account Track...
In the Password field, type in your printing account tracking code. Then click on OK until all the dialog boxes are closed.


You have now succesfully installed the printer driver.


Mac OS X

Unzip the printer driver file, go into the resulting Driver folder and run the appropriate driver package for "letter" sized paper. In the case of our example, we will be installing a driver for the Konica C364 colour printer onto a Mac running OS X 10.7.
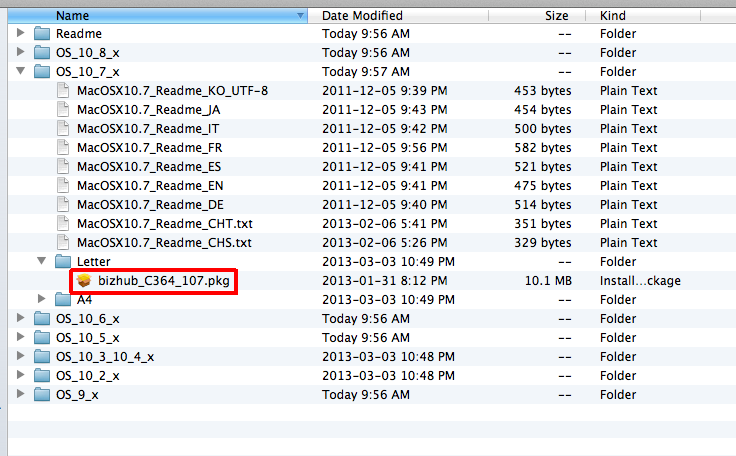
Double-click on the appropriate package file and then Continue through all the prompts until the installation is complete.


You have now succesfully installed the printer driver.